When your application installed in the field has user configured information, it is imperative that this user data be preserved during Major Upgrades as the newer application is installed.
During Major Upgrade processing, one of the options is that the original application is completely uninstalled (silently), which will destroy this user configured data.
You could have user configured information appearing in any of the following traditional components:
- Registry entries
- INI file entries
- XML document entries
- File information
Using as an example, Registry Entries, here is the process you will need to follow when preserving registry entries that are found in earlier versions of your application.
- Identify the registry entries & whether they are numeric or string entries
- Now create System Search Entries to retrieve each Registry Entry into a MSI Property.
- Now go to the Property Manager and ensure that the correct default value is entered for the new Entry
- Now if the registry value from the original application is a numeric value, we have to add an additional step to resolve the issue that is caused when you send a signed numeric value into a string
- Now we need to tie the new MSI Property “ENABLE_ANNOTATION_REG” to the registry entry in the component that installs it.
Now, I will expand on each of these steps..
Process to preserve registry entries
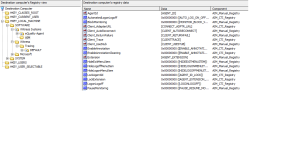
- Identify the registry entries & whether they are numeric or string entries. Here is shown an example of registry entries in the InstallShield project:
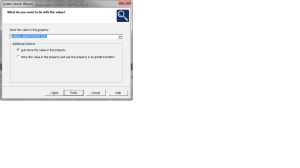
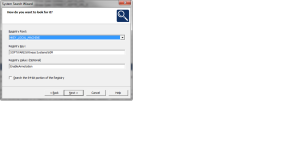
. Now create System Search Entries to retrieve each Registry Entry into a MSI Property. Select one registry entry, HKEY\Software\Witness Systems\AIM\EnableAnnotation” – a string value and create a System Search entry:
- Now go to the Property Manager and ensure that the correct default value is entered for the new Entry “ENABLE_ANNOTATION_REG”. This is because this value will become the string entry for the registry. In the case of an existing client – the registry value would be retrieved and stored here. Then when the new installation is completed, the value found within the registry comes from the previous installation. If no previous installation exists, the value plugged into the registry is the value from the Property Manager.
- Now if the registry value from the original application is a numeric value, we have to add an additional step to resolve the issue that is caused when you send a signed numeric value into a string. A numeric value such as “1” is stored as “#1”, which becomes “S1” in a string property.
We need to create a Custom Action “Trim_Values” that executes a simple VBScript that will strip off the “#” sign, such as:
dim value
‘Remove the extra hash off of the dword values
value = Session.Property(“ENABLE_ANNOTATION_REG”)
Session.Property(“ENABLE_ANNOTATION_REG”) = Replace(value,”#”,””)
We need to create a Custom Action with these properties:
It’s ok to always execute this – no impact if the value is default because no previous installation was found..
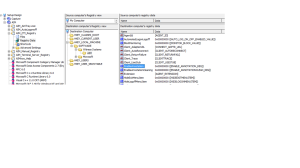
- Now we need to tie the new MSI Property “ENABLE_ANNOTATION_REG” to the registry entry in the component that installs it. Here is a snapshot of the result:
Note how you can see ([ENABLE_ANNOTATION_REG]) is shown in the display, but if you modify the entry you don’t see the reference. You just have to enter [ENABLE_ANNOTATION_REG] overwriting the default entry.


Leave a comment